Pebble Art, as I like to call it, is becoming increasingly popular as people find themselves appreciating nature's treasures and the enjoyment of scavenging and beachcombing for things such as driftwood, beach stones, small rocks, pebbles, sea glass and found bits of china and pottery.
In a time and age where we feel the need and desire to recycle and re-love old, used and found objects, Pebble Art and the knowledge of how to drill holes in beach stones has found its place in many a professional jewellers skills set, repertoire and craft makers workshop.
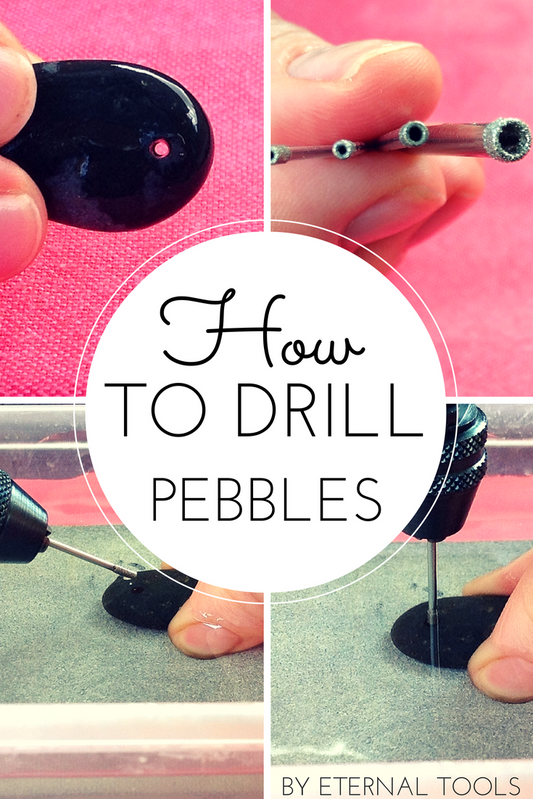
The good news is that with just a tiny amount of equipment and the right tools, you too can begin to drill holes in small stones and pebbles and make jewellery, lamps, key rings, succulent plant holders, mobile hangings, light pulls and decorative items around the house. Why don't you follow me while I show you how to make the perfect hole...
What You Will Need:
- Pebble, beach stone, garden pebble or other natural stone.
- Marker pen or Chinagraph pencil
- A rotary tool such as a Dremel or regular drill (I'm using a Dremel 3000) with Flexible Shaft (optional) and/or drill press.
- Diamond Bit, i.e.Small Diamond Core Drill (I'm using 2 mm bits in these images), but you can also use a solid-ended Small Diamond Drill Bit (great for really hard pebbles and any with flecks of flint or quartz)
- Collet or adjustable chuck, such as the Dremel Multi Chuck, will hold the small diamond drill bits.
- Shallow water dishes such as a plastic food container or rectangular ice cream tub
- Piece of wood or rubber to rest your material on as you drill
- Wear safety glasses and a dust mask
- Have an old cloth or tea towel to mop up any water or debris from your work surface.
- Patience!
Choosing A Good Pebble to Drill
Choosing the right pebble to drill through can distinguish between drilling for 40 minutes or drilling for 2 minutes.
When picking out the right pebble to drill, try to opt for one that is solid in colour, rounded and thin, with no obvious flecks of white or tan coloured pieces in them.
- Solid in colour
- Round and thin
- No flecks of white or tan
The flecks of white you see could be crystals of quartz, and the pieces of tan colour could be flint. Both of which can be beasts to drill through!
Often, as I've done many times, you only discover flint running through the middle of the pebble once you've been drilling for about 30 minutes, and you're still only halfway through making your hole.
However, don't be put off by drilling stones such as these harder pebbles, as all hard rocks can be drilled through; you may need a bit more time and possibly a few drill bits if it's really tough.
This is where using the right drill bit is vital. You may wish to try the small diamond drill bits. As it sounds, a solid drill bit has a solid end (no core), and, therefore, more surface area making them ideal for particularly hard stones, and you may find on flint pebbles these last longer than the core drills.
On this note, the stone drills with a solid end are also vital for use when drilling holes in precious and non-precious stones that are high on the Mohs scale of hardness.
If you've picked a thin, smooth stone that is light in weight, it should take you less than a few minutes to make your hole. A good clue is the stone surface; if it's a bit chalky, it will be acceptable to drill through.
Don't wait until you've gone on your summer holidays to look for your pebbles on the beach; other places to look are on driveways, in your garden, lake shores, streams and river beds. As with sea glass collecting, finding pebbles can be just as fun as what you finally do with them.
What Size Diamond Drill Bit to Use
The size of the drill bit you choose will depend on what you'll use the drilled pebble for.
Before starting your project, know what you will be doing with it once it's finished. For instance, if it's going to be a keyring, you need to know the width of your keyring fitting to ensure you drill a big enough hole.
To drill a small hole, I use a 0.75mm, 1.5mm, 2mm or 2.5 mm diamond drill bit for jewellery work and hangings. Try a Bottle Neck Diamond Core Drill if you need a larger hole than 3mm. These will also fit into your rotary tool.
Suppose you're at the experimental stage; why not try a Diamond Drill Bits Set for your Dremel, which is mentioned above under the list of what you will need? This little kit contains the Dremel Multi Chuck and a variety of 4 diamond drill bits.
If you've drilled your hole and discovered the hole size is not big enough, don't despair; you can always expand the mm hole size using a diamond twist drill.
These twist drills have diamond grit that is bonded vertically up the shank of the drill bit, so they're perfect for expanding hole sizes that have already been created, grinding away at the insides of the hole to make the walls of your hole wider.
- Measure the diameter of the fitting or thread that will be going through your stone.
- Choose a popular drill bit size
- Buy an assortment of drill bit sizes in a set
- Expand the hole if necessary, with a diamond twist drill in a different size to the drill bit you made the hole with
Step 1. Setting Up
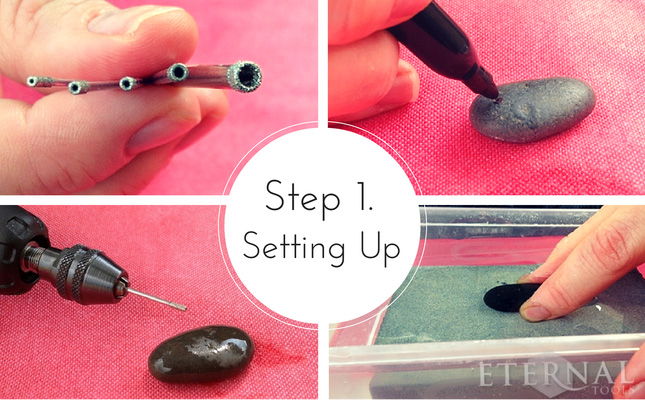
1. Mark your stone with your marker pen or chinagraph pencil where you wish the hole to be.
2. Set up your water tray by placing your piece of wood or rubber into the tray, place your pebble on top and pour enough water in until the stone is covered by about 1cm of water.
3. Select your drill bit and attach it to your Multi Chuck (see the video below if you need help). As mentioned before, ensure there is enough of the drill bit is exposed so that as you drill into the stone, the water doesn't touch your chuck or any part of your power tool.
Helpful Tip: It is possible to drill halfway through one side of the stone, flip it over and carry on drilling through the other side. If this is your preferred method, then you will need to measure the stone to find out where the entrance and exit holes will be so that they line up.
To do this:
- Take two pieces of cotton or thin masking tape.
- Wrap the cotton around the stone so that they cross.
- Where the crosses meet on the top and underside of your stone, mark with your pen, carbide tip, or diamond scriber.
This method is ideal if the depth or thickness of your pebble or stone is bigger than the length of the drill bit. Our 3mm extra long diamond drill bits will also solve this problem.
Safety
Before we start, let's ensure our working area is nice, clear, and clutter-free.
When using rotary drills, always make sure there's nothing around that will get caught in your lead or that you could knock with your elbow, and no floaty arm sleeves or scarves, please!
Using a stand with a flexible shaft can help keep things tidy and out of your working area a little bit better.
Warning. It goes without saying you should always be extra vigilant when using water near a drill. On this occasion, I had my drill plugged into an extension lead with a safety thermal cut-out to prevent overheating.
Keep your old cloth or tea towel on hand to ensure your drill, working area, and hands stay dry at all times. No touching electrical appliances with wet hands!
Furthermore, as you drill into your pebble, ensure the drill bit is always far enough out of your chuck so that the chuck or drill doesn't touch the water.
And lastly, please wear your mask and goggles and make sure your working area is nicely ventilated.
- Clear the area
- No floaty sleeves or flowing scarves
- Vigilance near water
- Mask
- Safety Goggles
- Apron
Step 2. Drilling

1. Start your drill at its slowest speed setting by submerging your stone in the water and holding it either with your fingers (please be careful) or a clamp or vice.
2. Angle your drill at about 45 degrees and take the drill to your stone and make an initial cut or pilot hole (left image in the picture above). As soon as this cut has been made, slowly move your drill into a vertical position (top right image in the picture above) and continue to drill, always on the slowest speed setting and with very little pressure.
Let the drill do the work. Drilling at an angle to make the initial cut helps prevent the drill bit from sliding and skittering across the surface of your stone.
3. As you drill, occasionally move the drill bit up and down to let in some water. This will help the water flow in and around your stone and wash out any debris. This will also help to keep the drill bit and your stone cool. Overheating can cause the diamonds to dull or come off the drill bit and the stone to crack.
IMPORTANT: Common issues are a temptation to speed up your drill or apply further pressure. Some pebbles will take a long time to drill through, but running your roatry drill at high speed, or applying too much pressure will shorten the life of your drill bit by dulling or burning the diamond grit off. You will make a hole eventually, so patience is the key!
Note: If you are using the method whereby you flip the stone over and begin drilling again from the other side, do so once you've drilled about halfway through and follow steps 1 to 3 again.
Note: The image in the above picture, bottom right-hand corner, is to demonstrate how the hole will look after some drilling. I used a 3mm diamond core drill for this was a different stone.
Step 3. Finishing & Further Ideas
As I mentioned, if you discover the holes you've drilled are not big enough and you need larger holes, you can expand them by using a diamond twist drill.
For further help on using diamond drill bits, you might like to read our article, 12 Things You Should Know about Diamond Drill Bits. All of your questions will be answered in this article, such as how long will my drill bits last. What is a core drill? Will they fit my drill? And lots, lots more.
If you've managed to drill some holes, have the hang of it, and want to try something a little different, why not try carving a heart into your pebble? Click here to follow our easy tutorial.
If you need to cut the stone in half, you can use a diamond slitting disc or a diamond wire hand saw blade in a saw frame.
Use a dab of Beeswax to add a natural polish to your stone.
How to Drill A Hole In A Rock
The principle and method are the same, except that you will need to use a larger sized diamond core drill bit. See the below notes for drilling a 'blind hole' for something such as a candle holder or a plant holder.
Ideas for your drilled pebbles
- Jewellery: necklaces, pendants, earrings and bracelets
- keyrings
- Mobile hangings. Mix pebbles with sea glass and driftwood for a coastal effect.
- Lamp stands
- Garden sculptures
- Light pulls
- Door and cabinet knobs (drill the hole part the way through to attach the bolt)
- Tea light candle holders (drill part the way through the stone with a 38mm large diamond core drill. See the helpful note below on drilling stones to make tea-light candle holders.
- Air plant or succulent plant holders
Helpful Note: Tea Light Candle Holders can be made by using a 42mm diamond core drill. Or the diameter size of your chosen tea light.
Read our article: 'How to Make a Beautiful Stone Tea Light Candle Holder in 4 Easy Steps.
1. Drill halfway through the top of the rock or stone or enough to sit your tea light into. You will be left with the internal core.
2. Using a smaller bit, say a 10mm core drill, drill the core away with many smaller holes until the core is broken down.
3. With a diamond cylinder burr, smooth the inside edges and the bottom of the hole where your tea light will sit to give a nice professional finish. A diamond disc burr would also be good for the bottom to grind away and smooth, but if you are on a budget, then the cylinder burr will do both or any spare diamond bits you may have to hand.
4. Sit your tea light into the stone and enjoy a candle-lit dinner.
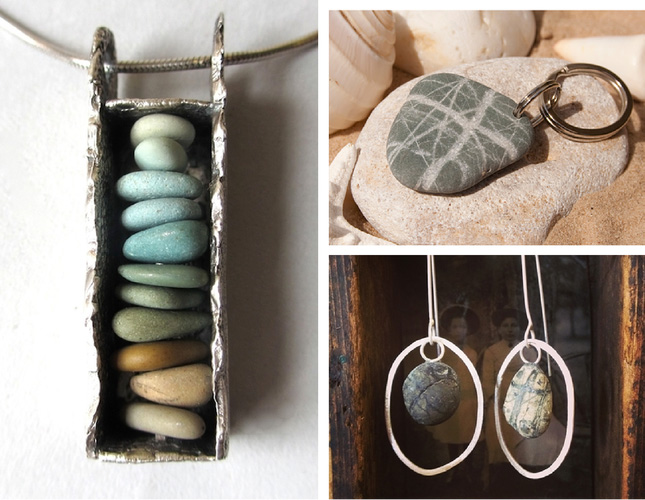
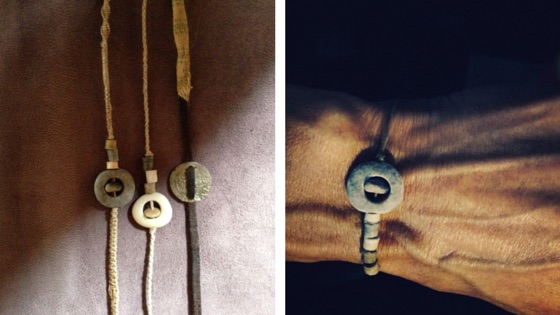
Some of our customer's inspiring work is shown in the above picture. From left to right is 'Heart Cairn' pebblestack pendant by Binks Edmunds of BinkArt, Pebble keyring by Driftwood Dreaming and earrings by Alek Lindus of Infinity Stop.
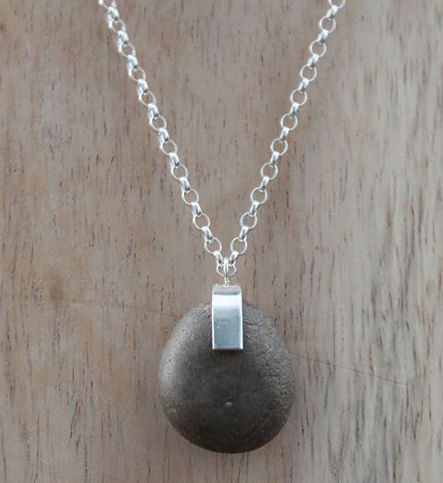
Below is a beautiful piece done by James The Jeweller. The hole has been drilled into the pebble, and a silver bail is attached.
Take a look below at a workbench set up for drilling holes in agate using our Small Diamond Drill Bits:
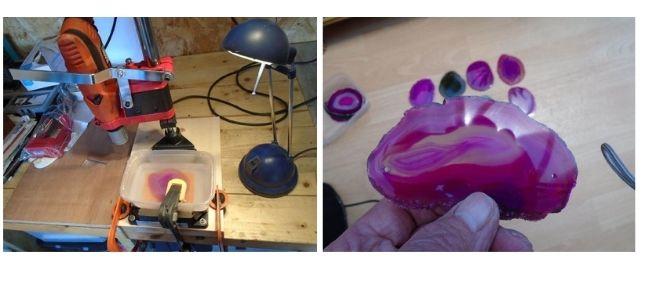
"These were good for drilling holes in agate. I used a water bath - a plastic container with plywood on the bottom (so I would not drill through the plastic) and an agate piece on the ply with the water just covering the agate. The drill was connected to a circuit breaker, just in case. It worked just fine, and my partner can now get on with her project."
Using the core of your drilled pebble
I'm all up for recycling and using every last scrap of my material if possible, and some of the best bits from the process of our work are often cast aside, forgotten about, or worse - binned!
Ordinarily, diamond core drills are used to create a hole in glass, ceramic or stone. However, many artists and scientists use them to extract the core of the drill bit rather than make the hole.
If you use the diamond core drill bits to make a hole, have you ever thought about doing something snazzy with those little bits of core debris that are left?
Alek Lindus from Infinity Stop makes beautiful jewellery from the natural resources around her. Once she's drilled the hole in her pebble with a 4mm or 5mm diamond core drill, she collects the little bits of core and re-drills them using a 1.25mm drill bit to make stone Seed beads.
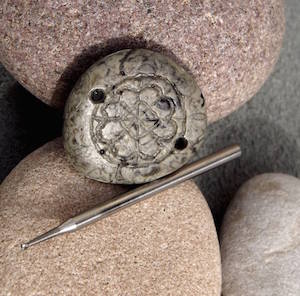
Carving a Design Into your Pebble
Maira Ribena from Akmensraksti carves designs into her Baltic stones using a selection of small tungsten carbide ball burrs and small diamond ball burrs.
There are various shapes of tungsten carbide burrs to choose from depending on the finish and carving you require.
More on this can be seen in the article "How to Carve Hearts in Pebbles and Sea Glass".
Avoid the Common Pitfall: Choosing the Incorrect Drill Bits
Have you been looking for a fun and easy way to create beautiful natural stone jewellery? You're in the right place! Here, we'll uncover the common issues that occur when the incorrect drill bits are chosen for drilling pebbles.
First Step: Find the Right Drill Bit
The initial step for any drilling task is to find the correct drill bit. In most cases, diamond bits, especially diamond-tipped drill bits and diamond core drill bits, are the best companions for your rotary tool, be it a Dremel drill with a flexible shaft, a drill press, or a hand-powered drill.
- Diamond drill bits, often referred to as a diamond-tipped drill bit, are designed to cut through hard materials - no other type of drill bit will cut through stone.
- A cheap rotary tool that comes with a pack of 'drills' is cheap for a reason, and quite often, they are not drills but burrs.
- Don't use a hammer drill.
- The best drill bits come with a decent price tag for a good reason. They cut cleaner and, when used properly, will last longer.
- Diamond drill bits for cutting stone and glass should be flat on the end - not pointed, ball-shaped, spade-shaped, or twisted.
- I've seen many people using differently shaped 'drills', but these are not drills but diamond burrs (or burs).
-
Diamond burrs are for carving, engraving and shaping - not for drilling.
I hope you enjoyed this tutorial, and I hope it inspires you to get creative and start drilling! We would love to see any finished pictures of projects you've embarked on; please send them to us. All the best on your crafting journey!
Disclaimer. To the our knowledge, using rotary tools near water has never been endorsed by any of the rotary tool manufacturers. If you do choose to drill near water or with attachments under water connected to your drill, then you do so at your own risk. Please be aware that mixing electricity and water can be very dangerous.