
What You Will Need:
- A large stone or piece of natural rock
- 1 x 42mm Diamond Core Drill (this will accommodate the most popular tea light candle size and will allow for a slight gap at either side of the candle)
- 1 x Smaller diamond core drill such as a 10mm, 12mm or 15mm (this is for further drilling to break down the stone's inner core you will be left with, so the size of the drill bit does not matter too much.
- Diamond burr such as a 10mm cylinder burr.
- Wooden template or jig (have a look at the notes below to find out how to make this)
- A Marker pen such as a Sharpie
- A Pencil
- A plastic tray filled with water and a cloth or sponge
- An Apron, or an old top and safety goggles
- Rotary drill (ideally with a variable speed) I used a regular household drill for drilling with the 42mm diamond core drill, and a Dremel 3000 with a Multi Chuck attachment with a 10mm Diamond Core Drill for breaking down the inner core and the 10mm diamond cylinder burr for the grinding.
- Felt protector pads
- Tea light candles
- Ruler or measuring tape
I've been asked many times how to make a tea light candle holder so I thought it was about time to show you how it can be done.
The same principle can be used to drill any 'blind' hole in stone. A 'blind' hole is one that is drilled part of the way through your material and doesn't exit through the other end.
I live in a Cotswold stone cottage so it seemed appropriate to Bring-the-Outside-In, and make my tea light candle holder out of some Cotswold stone.
I found a nice slab down in the garden by the stream and gave it a good clean-up with some light bleach and a bit of scrubbing.
If you live in a coastal area, have a hunt on the beach for some beautiful washed-up pebbles you can use. Alternatively, go 'industrial' and use a red house brick with a personalised engraving carved into one side. (You can carve into brick or stone using small diamond ball burrs)
The tools you use to make this candle holder can be used again and again so start collecting some rocks and stones now!
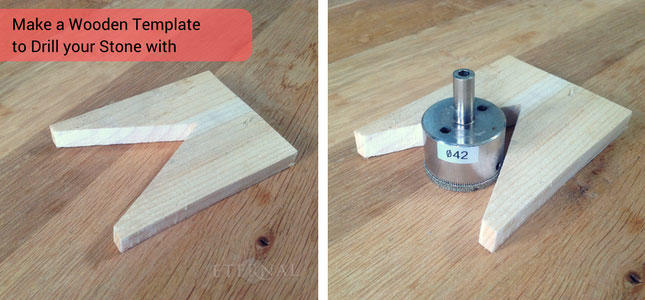
Making a Wooden 'V' Template for drilling Holes
With a saw, I made a very simple V template out of a bit of wood I had lying around. You can do the same with a piece of chipboard or plastic as well. (You will need a hacksaw to cut plastic)
Make sure the widest part of the V, or the opening, is wider than the diameter of your 42mm diamond drill bit. The drill bit will then sit in the middle of the V when you're drilling your hole.
You can use this wooden V template time and again and with lots of other drill bit sizes. The smaller the drill bit, the further it will sit in the V.
What's the advantage of having a wooden template?
This template will help prevent your drill bit from skittering and skating across the surface of your stone when you start to drill. Once the initial cut has been made into the stone, you can remove the template and carry on drilling.
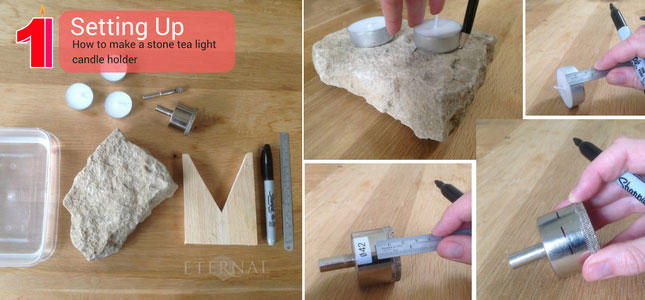
Step 1. Setting Up
1. With a pencil, draw around the candle on your stone where you want it to be.
2. Measure the depth of your tea light candle:
With a marker pen, mark the same depth all the way around on your 42mm diamond core drill and your 10/12mm core drill.
When you drill down into your stone this will indicate how far down you need to drill.
Decide prior to drilling if you want the tea light to sit flush with the surface of your stone or to be sunk in a bit.
3. Attach the 42mm diamond core drill to your drill.
I'm using a regular household drill. Ideally, you want one that has a variable speed on it so you can run the drill slowly. (at a slow speed you will preserve the life of your diamond core drill by preventing it from overheating)
4. Soak the stone with plenty of water, keeping the tray of water and a sponge nearby so you can keep applying water to the stone and the drill bit whilst drilling. This helps to keep the drill bit cool and prevents it from overheating. If it overheats the diamond grit will burn off.
5. Safety Googles on.
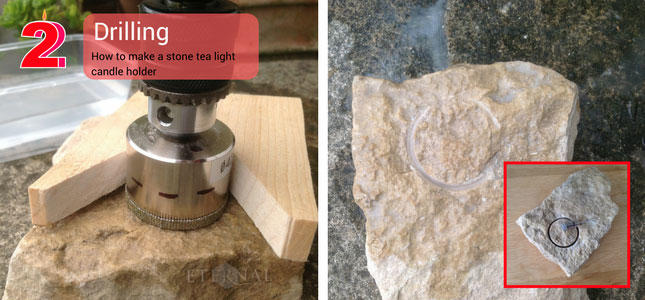
Step 2. Drilling with the 42mm Diamond Core Drill
1. Place your wooden V template on the stone and slot in your drill bit so it sits comfortably in the middle of the 'V'.
2. Hold the template with one hand, you will want to apply a little inward pressure once you start drilling just to make sure the wooden template doesn't move around.
3. With the other hand you can start drilling. If you do have a variable speed setting on your drill this is where you want to make sure it's on the slowest speed.
4. Make the first initial cut. Once the drill has bitten into the stone and formed a circle you can remove the wooden template.
5. Apply more water to the stone.
6. Continue drilling. Keep on drilling, stopping occasionally to apply more water, until you reach the right depth (this you marked on your drill bit with the pen)
7. At this point you will be left with a clean circle and an inner core.
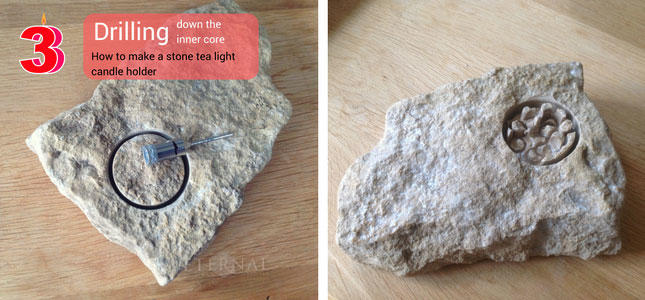
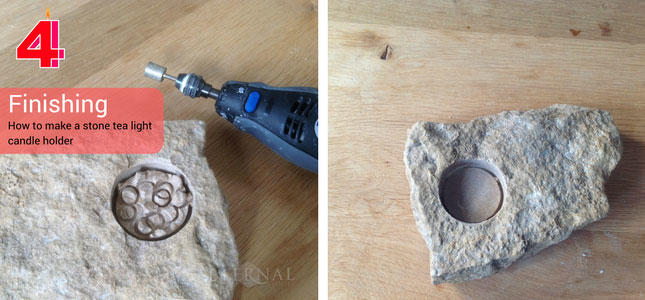
Step 3. Drilling Down the Inner Core
1. With the smaller diamond core drill, following the same procedure, drill various holes into the inner core, close to one another.
You will notice that as you do, some of the stone breaks away leaving you with a much easier core to grind down with your diamond cylinder burr at the end.
Helpful Note: I used a regular drill with the 42mm diamond core drill, then switched to using a 10mm Bottle Neck Diamond Core Drill in my Dremel 3000 (you'll need a Dremel Multi Chuck as well to hold the shank of the Bottle Neck Diamond core drills).
However, you can use the same drill throughout using the standard diamond core drills, but you will find it easier in step 3. to grind the core out if you're using a handheld rotary tool such as a Dremel because they are lighter to hold and easier to manoeuvre.
Step 4. Finishing
1. Attach your 10mm Diamond Cylinder Burr to your rotary tool.
2. On a slow speed, and again with plenty of water, begin to grind away the bottom of the core until you are left with a beautiful smooth surface.
3. Stop every now and again to make sure the tea light sits well within the stone. If it is raised up on one side, you know where to grind down a bit further.
Helpful Note: Attach some felt furniture protector pads to the bottom of the stone to protect any wooden surfaces you might place the candle holder on.
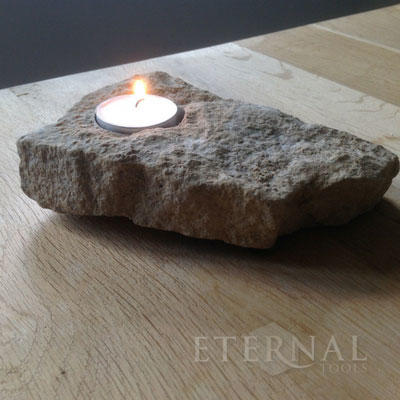
So there you have it - How to Make a Beautiful Stone Tea Light Candle Holder in 4 Easy Steps.
If you've tried this at home using our tutorial, or if you have any further helpful tips, send in your thoughts comments and images, we'd love to hear from you.