
It's important to drill through ceramic and porcelain tiles carefully and accurately in order to avoid damaging the tiles, a daunting task for many especially if the tile is currently fixed to the wall.
These types of tiles are hard and brittle, which means that they can crack or break easily if not handled properly. Using the correct drill bit and drilling technique can help prevent this from happening. But first, let's be clear on the type of tile you're going to be drilling through.
The Differences Between Ceramic and Porcelain Tiles
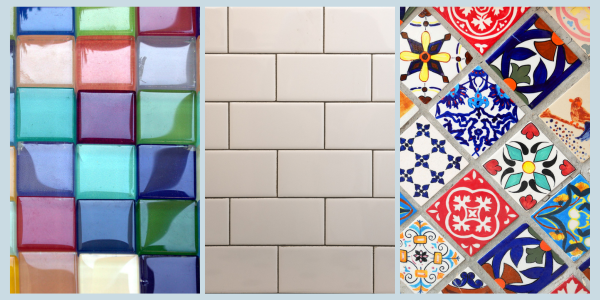
Ceramic and porcelain tiles are both popular choices for flooring, walls, and other surfaces in homes and businesses. While they may look similar, there are some key differences between the two.
Ceramic tiles are made from a mixture of clay and other natural materials, which are then fired at high temperatures. They are typically less dense than porcelain tiles and have a more porous surface.
Porcelain tiles, on the other hand, are made from more refined clay and are fired at even higher temperatures than ceramic tiles. This process makes them denser and more durable than ceramic tiles, with a less porous surface.
One of the main differences between ceramic and porcelain tiles is their water absorption rate. Porcelain tiles have a lower water absorption rate than ceramic tiles, which makes them less prone to cracking and breaking in areas with high levels of moisture. Porcelain tiles are also more resistant to stains and scratches than ceramic tiles, making them a popular choice for kitchen and bathroom floors.
How Will These Properties Impact Drilling?
The properties of ceramic and porcelain tiles can affect the drilling process in different ways. Here are some of the key properties of each type of tile and how they can impact drilling:
Ceramic tiles:
- Porous surface: Ceramic tiles have a more porous surface than porcelain tiles, which means they are more susceptible to cracking or breaking during drilling. The drill bit can catch on the surface of the tile, causing it to chip or crack.
- Softer material: Ceramic tiles are generally softer than porcelain tiles, which can make them easier to drill through. However, this also means that the drill bit can wear down more quickly, especially if you are drilling through multiple tiles.
- Lower density: Ceramic tiles are less dense than porcelain tiles, which means they may require less force to drill through. However, this also means that the tiles may be more prone to cracking or breaking during drilling.
Porcelain tiles:
- Harder material: Porcelain tiles are harder and denser than ceramic tiles, which can make them more difficult to drill through. The drill bit may need to be sharper and more durable to penetrate the surface of the tile.
- Lower water absorption rate: Porcelain tiles have a lower water absorption rate than ceramic tiles, which means they are less likely to crack or break due to moisture during the drilling process. However, this also means that the tiles may generate more heat during drilling, which can cause them to crack or break if they are not properly cooled with water.
- More durable: Porcelain tiles are more durable than ceramic tiles, which means they are less likely to crack or break during drilling. However, this also means that the drill bit may wear down more quickly, especially if you are drilling through multiple tiles.
In summary:
Ceramic tiles are generally softer and less dense than porcelain tiles, which can make them easier to drill through but more prone to cracking or breaking.
Porcelain tiles are harder and more durable than ceramic tiles, which can make them more difficult to drill through but less likely to crack or break. Regardless of the type of tile you are drilling through, it is important to use the correct drill bit and drilling technique to avoid damaging the tile.
Alternatives: Glass Tiles
Glass tiles are a versatile option for adding a unique and artistic touch to a variety of surfaces and can be drilled in the same way as ceramic and porcelain tiles using diamond drill bits.
Glass tiles are popular for use in backsplashes, shower enclosures, swimming pools, and other areas where their reflective and translucent properties can create a stunning effect.
The Tools You Will Need for Drilling Holes In Ceramic & Porcelain Tiles:
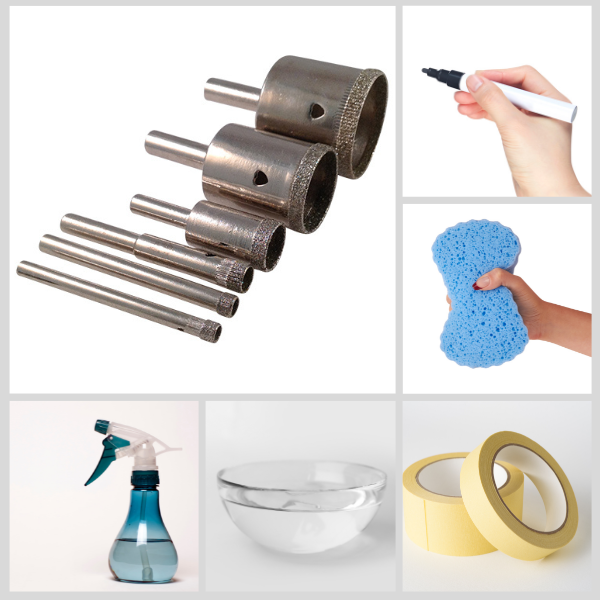
- Tile Drill Bits: Diamond Core Drills for ceramic tile
- Sponge and bowl of water, or a spray bottle (for use on tiles already attached to the wall)
- Masking tape
- Marker pen
- Safety goggles and Eye protection
- Old cloth or tea towel for wiping up
Obviously it will all depend on what you are going to be doing with this new hole you're creating in your ceramic tile as to which is the best drill bit for the job. Needless to say, the right tools for the job will save you time and money.
The important thing to note is that the only drill bits which will cut through ceramic and porcelain efficiently are diamond drill bits. More specifically, Diamond Core Drills (sometimes referred to as Diamond Hole Saws).
Without going into too much technical detail I want to explain why a diamond-tipped drill bit is the right drill bit for drilling holes in tile rather than regular drill bits such as a masonry bit or a carbide bit.
Diamond is much harder than steel or carbide and will therefore cut harder materials such as glass, stone, ceramic and porcelain, so a diamond drill bit will cut cleaner, quicker and with more precision than standard drill bits.
You may have seen that carbide-tipped bits in a spade shape are often suggested for use in hardware stores (sometimes referred to as ceramic tile bits) however, these are the worst possible drill bit for drilling tile.
Carbide is brittle so a carbide tip can easily break under too much pressure and the spade shape will not give you an accurate hole size. (Carbide drills are intended for drilling holes in hard metals, and standard drill bits made from steel are used for drilling holes in soft metals)
What Size Diamond Core Drill Do I Need?
Fixtures and fittings that you've ordered should come with instructions and dimensions which will hopefully tell you the size of drill bit you need. Ordering the wrong drill bit size could mean an unsightly gap either side of your fitting which you'll then have to fill so to avoid this here are some helpful sizes often required for tile wall drilling purposes:
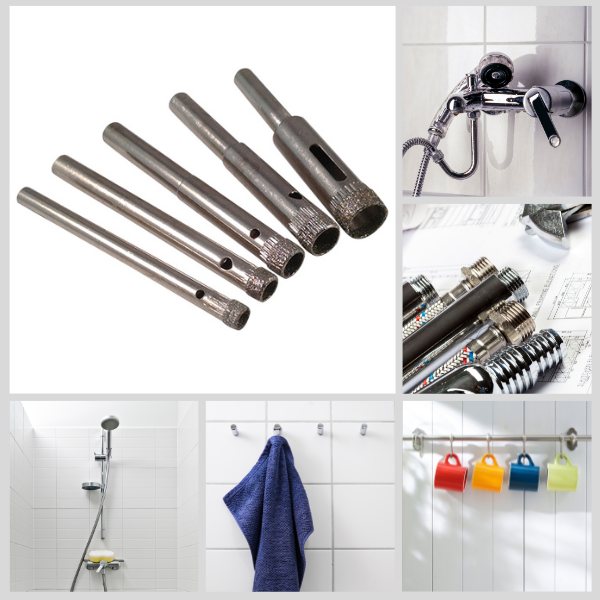
Quite often a 6mm hole is required in bathroom tiles and kitchen tiles for small fixtures. Therefore a 6mm diameter diamond core drill bit will also be needed to drill the hole.
This 6mm hole will be for the smaller items in your bathroom and kitchen such as
- Toilet roll holders
- Kitchen towel holders
- Toothbrush holders
- Hooks
- Towel rings
- Towel bars
- Soap dishes
- Razor holders
- Magnetic knife blocks
- Shower baskets
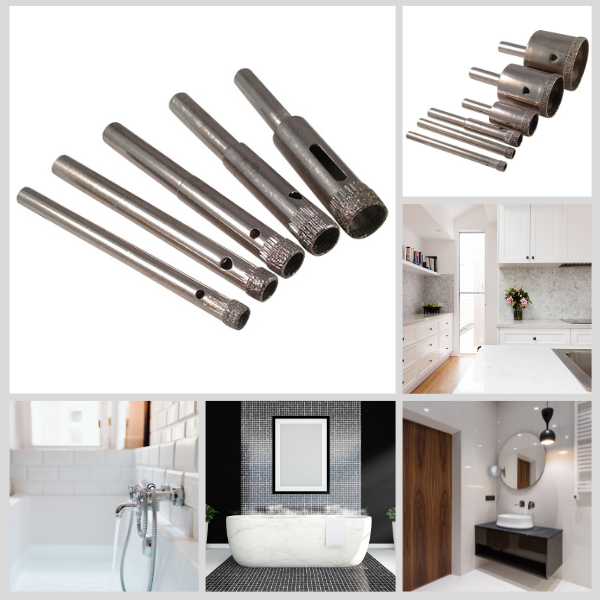
Large holes such as 8mm or 10mm are often required for larger items such as:
- Cabinets
- Cupboards
- Mirrors
- Shower frames
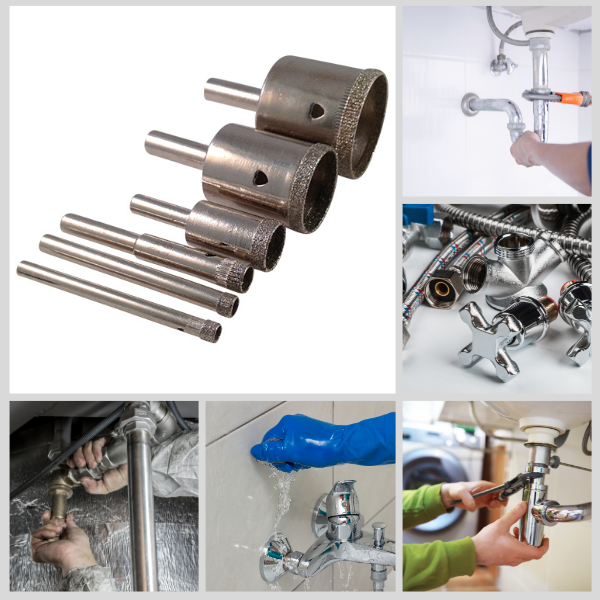
Even larger holes such as 20mm and 25mm are required for:
- Plumbing fixtures and fittings
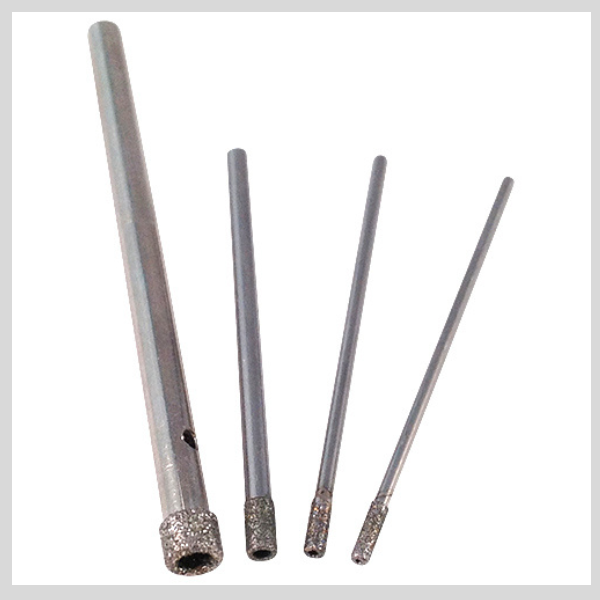
Small holes maybe in 3mm, 4mm or 5mm will be required for the following:
- Wall anchors
- Studs
- Plugs
Step 1: Preparing And Marking Your Tile
- For ceramic tiles already attached to the wall mark the position of where you require the hole to be with a marker pen.
- Place a strip of masking tape over the top. When you begin to drill the masking tape will help prevent any skittering across the surface of the tile.
(For drilling tiles not yet attached to the wall mark your intended drill hole in the same way and place the tile into a tray which can catch the debris and water.)
Preparing the ceramic tile before drilling is an important step to ensure that the drilling process goes smoothly and that the tile does not crack or break. Here are some reasons why preparing the ceramic tile is important:
Prevents slipping: Drilling tile is a slippery business, especially when they are smooth or glazed. Applying masking tape or painter's tape to the surface of the tile can help prevent the drill bit from slipping, which can cause it to scratch or damage the tile.
Protects the surface: Applying masking tape or painter's tape to the surface of the tile can also help protect it from scratches or other damage that can occur during drilling.
Provides a guide: Marking the spot where you want to drill with a pencil or marker can help provide a guide for the drill bit, which can help ensure that it stays on track and does not wander or slip. This is particularly important if you need to drill a precise hole in the tile.
Step 2: Start The Drilling Process
- Put your safety goggles on, roll up any dangling sleeves and put on your mask.
- Soak your sponge in water (It's a good idea to keep a bowl of water to hand in order to top up) and place it directly next to your intended drill hole, or have your spray bottle at the ready.
- Attach your diamond-tipped bit to your rotary tool.
- Start the drill: Diamond bits should always be used at a slow speed so set your rotary drill to its lowest RPM to begin with (you can always speed up a tiny bit once you get going). Remember though that more speed means more heat and this can crack your tile and burn the diamond grit from your drill bit so my advice is not to exceed 10,000 RPM.
(The purpose of using a lubricant such as water is to ensure the material and your nice new special drill bit do not overheat which can cause your tile surface to crack and will shorten the life of your diamond drill bit)
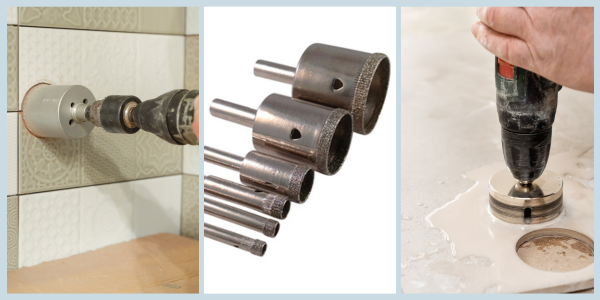
Step 3: Drilling Techniques
- Angle your diamond core drill on the masking tape to begin the drilling to make the initial cut.
- Return it to a vertical position to continue drilling at a slow drill speed.
- At the same time spray some water or squeeze water from your sponge directly onto the drilling process to keep everything cool.
(The angling of the core drill bit will help to prevent any skittering across the surface, but also the masking tape can help as well so it's not always necessary. Also if for any reason you've drilled in slightly the wrong place you've only made one tiny cut)
Clean Up
Once you have finished drilling, remove the masking tape and clean up any debris or dust. You can use a damp cloth to wipe down the tile and remove any excess water.
Safety Measures
Disclaimer. Using a power drill or rotary tools near water has never been, to the best of our knowledge, endorsed by any of the rotary tool manufacturers. If you do choose to drill near water or with attachments under water connected to your drill then you do so at your own risk. Please be aware that mixing electricity and water can be very dangerous.
- Please wear safety glasses and ensure you have no dangling sleeves, scarves or necklaces in the way.
- Make sure your work area is clean and free of obstructions.
Similar Projects For Drilling Ceramic And Porcelain
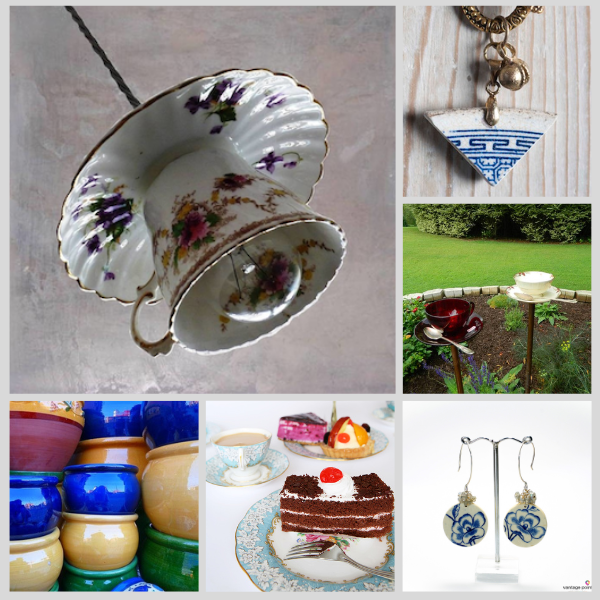
Roughly speaking the same technique with a few small changes can be applied to any project whereby you will be drilling through ceramic or porcelain. Sculpture, art, crafts and jewellery making may all require this ability to drill through these hard materials and all will need to use a diamond drill bit. Some of the most popular projects you might wish to get involved in are the following:
- Drilling holes in Beach Pottery (sometimes referred to as beach shards)
- Drilling holes in Broken china
- Drilling holes in china plates to make cake stands or jewellery
- Drilling holes in teacups, teapots and bowls to make bird feeders or succulent holders.
- Drilling holes through glazed pottery and glazed clay tiles
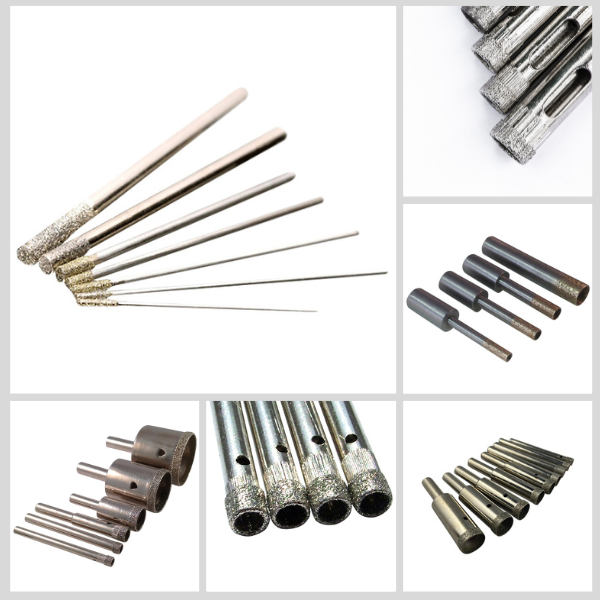
There are different types of diamond drill bits suited for different jobs. If you're drilling tiles all day every day as a professional then a masonry diamond drill bit or a sintered diamond drill bit will be necessary.
If it's just one or two holes you're looking to drill then a standard coated diamond core drill will suffice and these are all available in various sizes from 3.50mm - 100mm and larger.
If it's small holes you're looking to drill through porcelain or bone china you will need to use a solid diamond drill bit (no core running through) as they can withstand the hard surface. These are available in tiny sizes from 0.75mm - 3mm.
And if you're drilling through very delicate, thin porcelain or ceramic, or you wish to extract a core from the material then try our Thin Wall Diamond Core Drills.
See the drill bits we've mentioned and even more in our full range here:
In conclusion, drilling through ceramic and porcelain tiles can be a challenge, but with the right tools and techniques, it can be done successfully. Remember to take your time, use the correct drill bit, and keep the tile lubricated with water to prevent any damage. With the right bit, a little patience and practice, you can become an expert at drilling through hard tiles and other hard materials. Good Luck!
For further help, you might also like to read our article: 12 Things You Should Know about Diamond Drill Bits