If you're new to working with glass, or you've been using a small variety of tools for years and wonder what all the other bits and bobs do - then this article is here to explain all.
What is Cold Working?
Cold working refers to any process that alters the state of the glass without using heat.
Examples and Techniques of Cold Working Glass
Cold working on glass may involve drilling, carving, cutting, sanding, grinding, de-burring sharp edges, engraving the surface of the glass, cutting out shapes in glass, filing glass edges, or sanding, polishing and finishing the surface to a desired effect.
When Would I Use These Techniques?
All cold working techniques can be done on glass in it's natural state or fused glass once it has come out of the kiln. Sometimes glass may need some adjustment before firing, or after it has come out of the kiln.
Do I Need Large Machinery for Cold Working Glass?
Not at all. All the techniques mentioned above can be done on a small scale without the use of large machinery and expensive tools.
So, What Tools Do I Need?
Many cold working glass tools can be used by hand, such as polishers and diamond files.
If you equip yourself with a simple hand held rotary tool such as a Dremel 3000, pendant drill, flexible shaft or Micro Motor then there's a whole world out there of exciting tools you can attach into your drill to use on glass.
Lets look at a few of the techniques and tools:
Drilling Glass
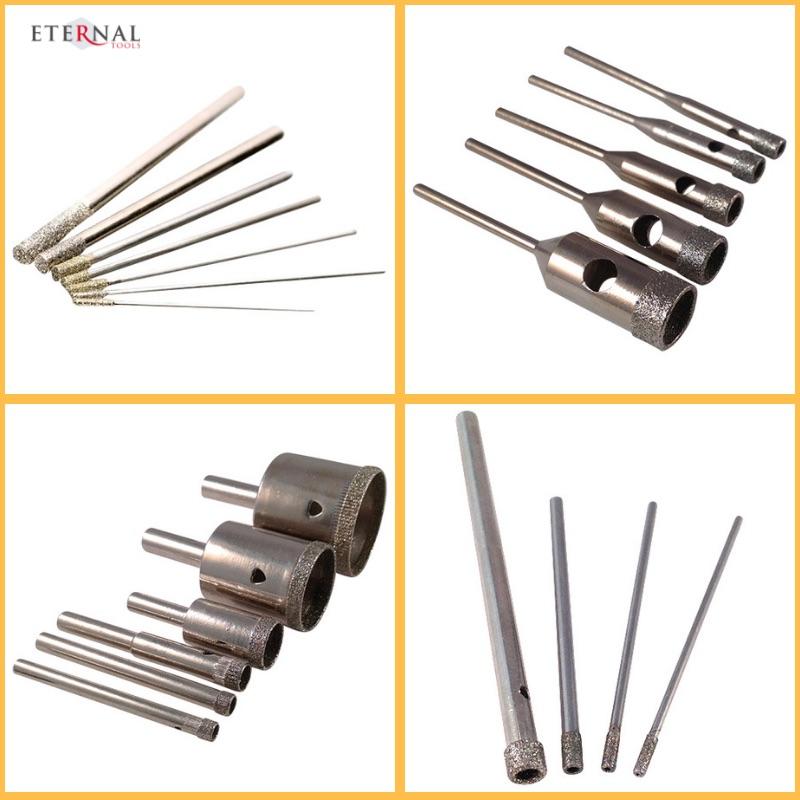
For drilling through glass you will need diamond drill bits.
Diamond drill bits come in many different sizes and shapes, different shank sizes and different diamond coating.
Whether you're drilling a tiny bit of sea glass or fused glass, or a large sculptural glass piece, or perhaps cutting out a circle for stained glass, there is a diamond drill bit for you.
Diamond Core Drills (the one's with the hole running through them):
That's right, these are the one's with the hole running part the way, or all the way through them.
The hole, or core, allows water to flow up and through the drill bit to keep it cool whilst you drill.
The most commonly used diamond core drills are electroplated, meaning the drill consists of a single layer of diamond grit which is nickel bonded onto a steel shank. They range in size from 1.00mm through to 125mm.
- Small Diamond Core Drills 1mm - 3mm
- Diamond Core Drills 3.5mm - 60mm
- Bottle Neck Diamond Core Drills (2.35mm shank) 6mm
For the professional, or those drilling large batch amounts of holes, diamond sintered core drills are often used. They contain several layers of diamond grit impregnated onto the shank and give a cleaner, sharper cut as well as being extremely hard wearing and very, very durable.
Sintered diamond core drills need to be dressed before use, during use, and after each use with an aluminium oxide stick to refresh the layer of diamond grit.
- Sintered Diamond Core Drills 3mm - 16mm
Small Diamond Drill Bits (the one's without a hole)
These diamond drill bits only come in tiny sizes ranging from 0.75mm - 3.00mm. They have no hole running through them and therefore have a larger surface area and are slightly more hard wearing than the small diamond core drills of the same size.
It is down to personal preference whether you use these or the small diamond core drills and many artists tend to have a combination of both in their tool kits.
Many fused glass artists find these preferable, as do sea glass artists if they have a particularly tough bit of glass. Also used for laboratory purposes on optical glass.
- Small Diamond Drill Bits 0.75mm - 3mm
Diamond Twist Drills
Incorrectly named really as these drill bits are not actually made with the intention of drilling holes in glass, but to expand already drilled holes. For instance, increasing the hole size in lampwork beads.
Diamond twist drills have diamond coating running up the shank in a twist, so as you ream the inside of the bead with the twist drill it turns and grinds away at the sides of the glass inside the hole, removing material as it goes.
- Diamond Twist Drills 0.5mm - 3mm
How would I Use Diamond Drill Bits to drill holes in glass?
- Diamond drill bits must be used on slow speeds (we recommend 5,000 RPM)
- Use with plenty of cold water and very little pressure.
This will ensure that the diamond grit does not burn off or wear out too quickly and will prevent your glass from breaking.
More on how to use Diamond Drill Bits can be found in this helpful article we wrote:
And for a couple of helpful articles on drilling holes in glass, take a look at these :
Cutting Glass
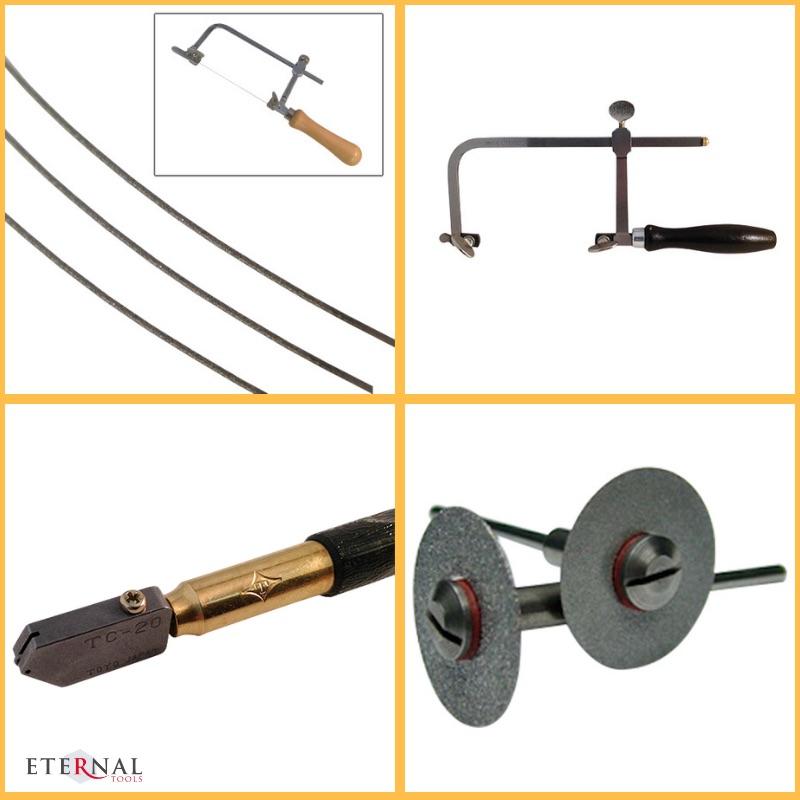
You may to wish to slice an edge off a glass piece by using a hand saw and a diamond saw blade, or cut a glass bottle or a piece of glass for a stained glass piece using a Glass Cutter with a carbide wheel at the tip. Or perhaps slice a channel into a glass piece in order to insert something, for this you would use a diamond slitting disc.
Lets take a closer look at some of the tools used to cut glass:
Cutting Glass Using a Hand saw and Diamond Saw Blades
Diamond saw blades are used in a jeweller's hand saw.
They must be used with water to prevent the diamond grit from burning off or wearing out too quickly.
They are often used for cutting small glass pieces or irregularly shaped pieces of glass. For instance, sea glass and small fused glass pieces for jewellery making purposes.
There is further information provided on cutting glass using wire blades this in this article:
Cutting Glass using Diamond Slitting Discs
Diamond Slitting Discs are small, thin cutting discs, often referred to as slitting discs as they make slits and slices through glass.
The best type can be found with evenly distributed diamond coating on both top and bottom of the disc, and coating from the middle of the disc out towards the very edge.
Particularly useful for slitting, slicing and cutting channels and inlays into glass.
How Would I Use Diamond Slitting Discs to cut glass?
- Attach the slitting disc to a screw mandrel and insert into your rotary tool.
- Use with plenty of water and on a slow speed (5,000RPM)
Glass Cutter
The two best brands of glass cutters are Toyo and Silberschnitt.
Glass cutters have a carbide cutting blade in the head and when you apply pressure onto the glass, a score line is created.
To oil or not to oil, that is the question.
There are many traditionalists who like to use oil with their glass cutters. However, with the advanced tungsten carbide wheels that are now used in glass cutters, oil is no longer necessary.
The carbide cutting blade or wheel ensures you end up with a clean and neat cut and because tungsten carbide is so durable it won't dull easily.
How To Use A Glass Cutter
- Maintain a consistent pressure throughout the score and don't force the cutter off the edge of the glass, roll it off gently.
- Lightly tap the underneath of the glass with the opposite end of the glass cutter and the glass should easily come away where you made the score line.
Take a look at our helpful article on How to cut a Glass Bottle:
Engraving and Carving Glass
There are various techniques used to engrave glass:
- Drill Engraving
- Stipple
- Laser Engraving
- Sandblasting
- Etching
- Copper wheel engraving
More on these techniques can be found in our article here:
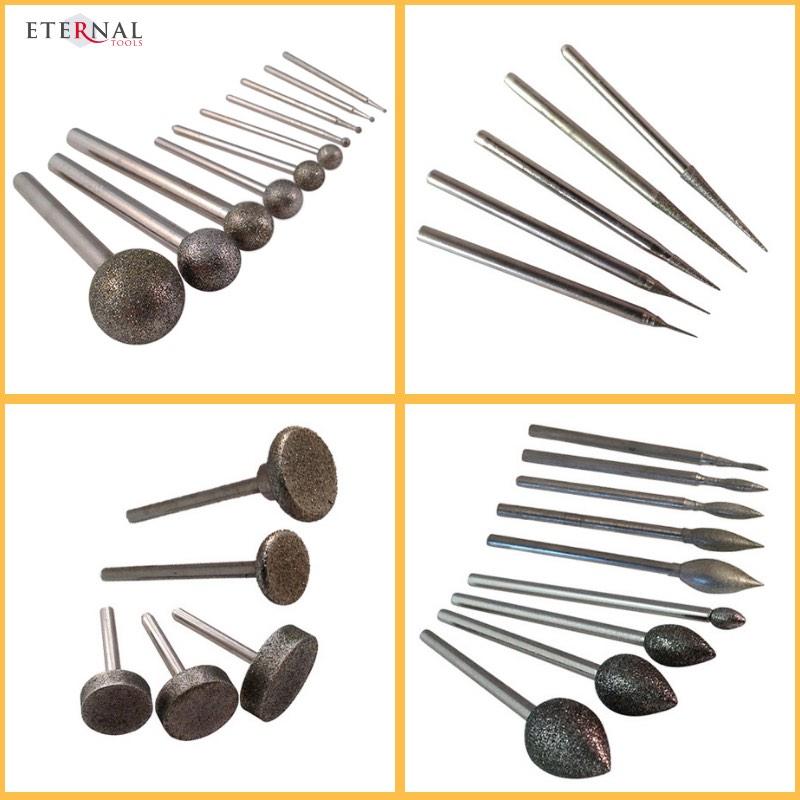
The most common form of engraving is the drill technique where various diamond burrs or points, abrasive stones and polishers are used to manipulate and carve into the surface of the glass.
You may be signing your name or creating an elaborate masterpiece in the glass - both can be achieved easily without the need for expensive equipment.
If you're new to glass engraving and would like ideas and tips on the equipment you'll need and how to use them take a look at our article:
You can start off with a hobby rotary tool, something such as a Dremel 3000 and then when you have mastered the art, spend out a little more on a Micro Motor such as the Medicool Pro Power 35K.
Grinding and Sanding Glass
Grinding down certain areas of the glass can be done either before fusing, or after.
You may need to achieve a certain shape, remove sharp edges or clean up sides and faces of the glass in preparation for polishing.
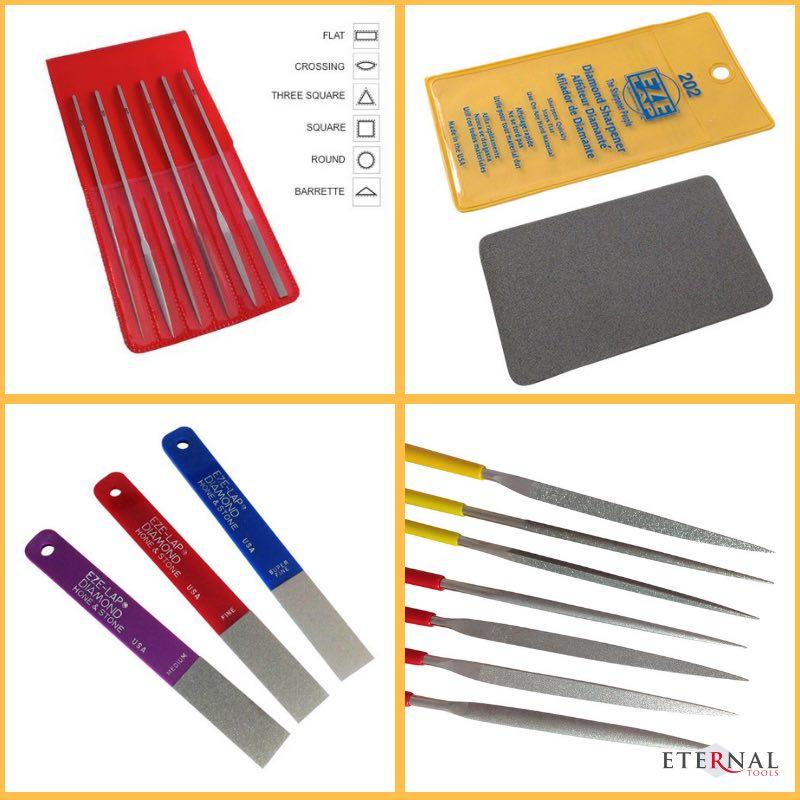
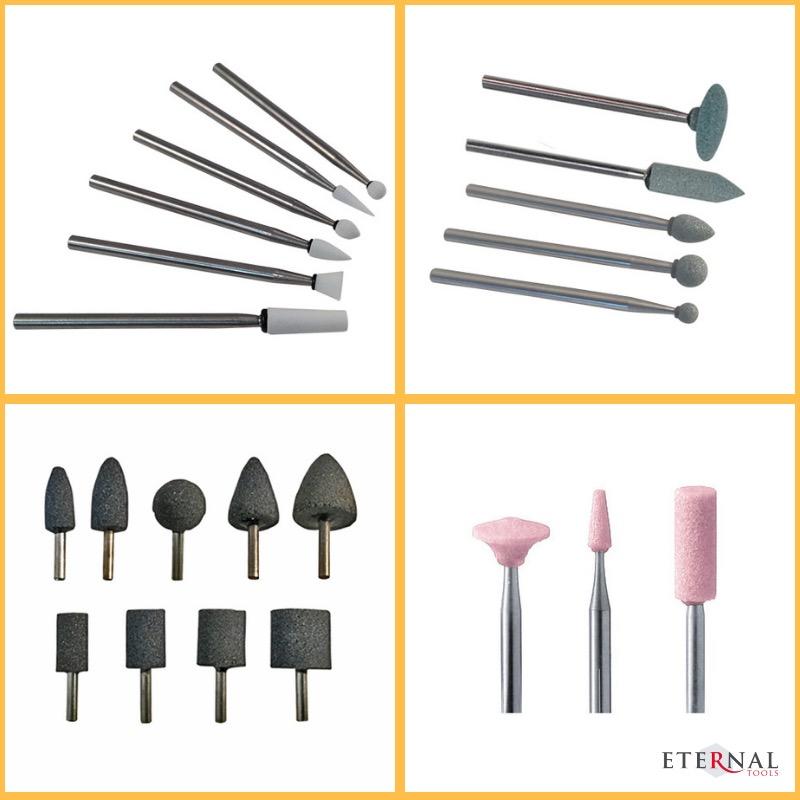
Diamond burrs or abrasive stones in a rotary tool will grind away and remove material quickly, however if you’re looking to smooth an area rather than remove lots of glass a hand tool such as a diamond file, diamond hand pad, diamond cloth, diamond paste (see below) or diamond sheet can be used.
- Diamond Burrs
- Abrasive stone burrs
- Diamond Files
- Diamond Hand Pads
- Diamond cloth
- Diamond Paste
- Diamond sheet
- Sanding bands
Polishing Glass
Some of the the tools used for grinding glass can also be used to polish.
For example; use finer grades of diamond hand pads and diamond cloths to polish and grind areas, and with a rotary tool you can apply diamond paste or cerium oxide to a felt point, or apply to discs, belts, wheels, or flat lap grinding machines.
Diamond Paste
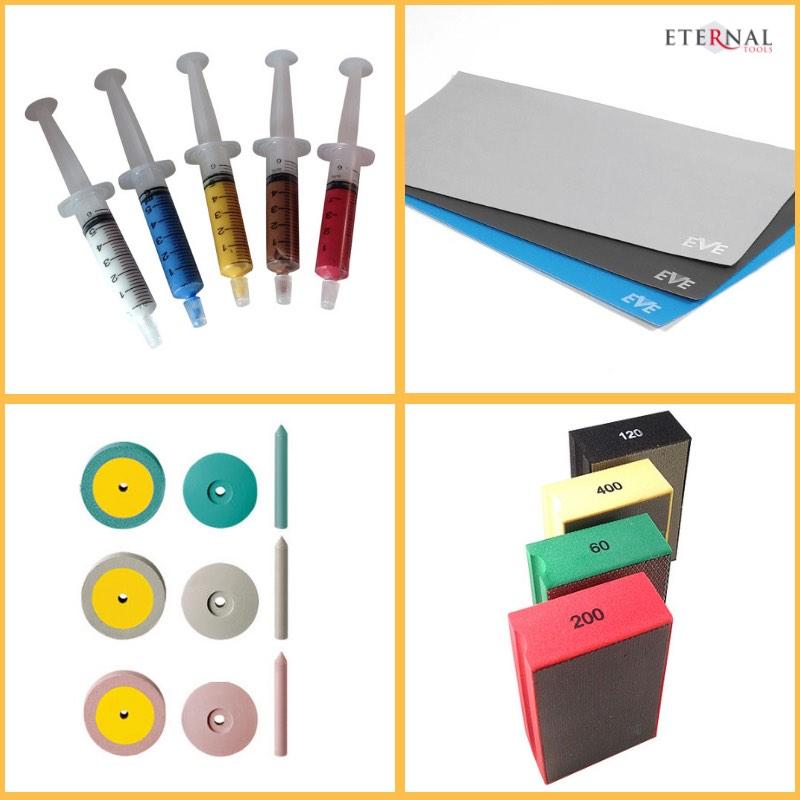
Diamond paste comes in various forms, grades of diamond grit, and colours.
Professional diamond paste will always have a high grade of diamond grit and be suspended evenly throughout in water soluble oil. So avoid diamond paste if the price seems to good to be true.
Ideally choose one that is ready mixed so all you need to do is apply it to a piece of felt or cloth.
- If you want to get a mirror finish or remove scratches and marks on glass then diamond paste is a must.
- Try starting with 6 micron (yellow) then 3 micron (green) and so on until the desired finish is achieved
- For glass engraving, use the diamond paste for the final stages of polishing, applying a tiny amount to a felt bob or point
- Use the finer grits such as 1 micron to restore and polish jewels or for superfine polish after having removed scratches
- Our diamond grinding paste will restore the shine to fused glass edges as well
How to Use Diamond Paste
Most diamond paste grinding and polishing is done progressively, starting with the coarser grade, 6 microns, and then finishing with the 1 or quarter micron grade.
If the work you are polishing is already of a reasonable finish then you can often skip the coarser grades and start with the 3 or 1 micron.
To apply the paste you can either use a felt polishing bob in a rotary tool. The finer grades of paste will absorb into wool, felt or material so be sure to apply these with wood, leather or plastic.
If using a wheel or belt, apply a small dab onto the surface and as the wheel or belt spins and you begin to polish, so the paste will be distributed on the surface.
Further Help and Other Useful Tools
If you need further help then take to the internet and enjoy watching some of the informative tutorial videos, or join a group such as The Guild of Glass Engravers, the Contemporary Glass Society, or seek out your nearest glass course.
Eternal Tools are always here to guide you to the right tools and answer any questions you may have. So please feel free to contact us.
Other useful tools to add to your tool kit are a headband magnifier - OptiVISOr are by far the best of the one's we have tested and tried over the years. They are extremely lightweight and comfortable.
- OptiVISOR Headband Magnifier
- Lights and Lamps
- Sharpie pens
- Tracing Paper
- Cushioning to hold the glass in place such as foam
- Water drip feed


