
If you're new to the wonderful world of glass engraving this short guide will provide you with a list of the small amount of kit you'll need to achieve something special. As you learn more and start to experiment with different techniques you can add different burrs, abrasives and polishers along the way.
Rotary Drill, Micro Motor, Dremel or Flex Shaft?
First things first, make sure you have something to hold your mounted burrs, polishers and abrasives in.
A handheld rotary tool such as a Dremel 3000 or something similar will do just fine, to begin with, and when you have the hang of it and more pennies in the piggy bank you can always treat yourself to a micro motor or a dentist's drill.
If you're using a Dremel 3000 then a flexible shaft will also be a good investment at some point. With the flex shaft, you can hold the lightweight handpiece much like you would do a pen or an artist's brush.
A Dremel multi chuck will come in handy here too. These allow you to easily change burs and mounted points and will also allow you to use a wider variety of bits and bobs with varying sized shanks (this is the bit that goes into the drill, not the working end)
Helpful note before buying a Dremel: If you would like to use a wide variety of burrs, polishers and stones to engrave with, do not purchase the Dremel 290 Hobby Engraver. This particular model is only compatible with two Dremel accessories, a carbide tip and a diamond tip.
Unable to use Electrical Tools? Try a Pin Vice or a Scriber
For councils, schools and youth groups who are concerned about children using drills and electrical equipment, we recommend using a pin vice to hold the diamond burs in. These are very economical ways to draw on glass with a diamond burr. Pin Vices are also useful if you want to try stipple engraving or you wish to delicately mark the glass for something such as whiskers or hair. In this case, try a diamond scribing tool.
************************
The following is a quick glance list to help you start engraving glass. Read on for more information about the purpose of each tool, optional extras and how to use your new glass engraving supplies.
Beginners Glass Engraving Kits
Alternatively, if you would like a beginners kit that is ready-made for you with all the bits you need, we have a few options:
- Glass Engraving Kit (Bare Minimum)
- The Lesley Pyke Glass Engraving Starter Kit
- Glass Engraving Kit (Experimental)
5 Glass Engraving Tools for Beginners:
- Diamond Ball Burrs: 0.8mm, 1mm and 3mm
- Green Stone Burrs. Silicon Carbide: Flame and/or 3mm Ball
- White Arkansas Stone Burrs: 3mm Ball
- Grey or Brown Rubber Silicone Burrs: Bullet
- Silicone Abrasives: Mixed bag of different grades
1. diamond ball burrs (2.35mm)
Diamond ball burrs are your starter tool for engraving glass. These are sometimes referred to as diamond spheres or points and sometimes the spelling can be burrs or burs, depending on your preference or the country's spelling. Popular sizes, to begin with, are the following:
- 0.8mm Diamond Ball Burr
- 1mm Diamond Ball Burr
- 3mm Diamond Ball Burr
Or you could choose a set of 7 diamond ball burrs including one of each of these sizes: 0.8mm, 1.0mm, 1.5mm, 1.8mm, 2.0mm, 2.5mm, 3.0mm
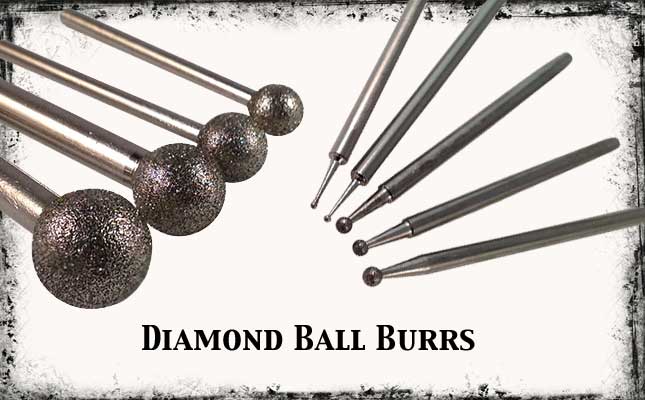
These ball burrs start as small as 0.8mm which is ideal for lettering and very detailed work, and continue up in size to as large as 50mm, great for cold-working glass artists and sculptors.
Most rotary drills will take burrs that have up to a 2.35mm (3/32") or 3mm (1/8") shaft or shank (the end of the burr that pops into your drill) which is essential to know when you're looking for your carving burrs as anything larger than this will mean you will need an adapter or a drill that can take larger shank sizes.
Coated or electroplated diamond burrs have a single layer of diamond grit meaning that once the grit has worn away or dulled you will need to replace the burr.
120 - 160# is a medium grit and is standard for coated burrs and ideal for your glass engraving endeavours. The higher the grit size, the finer the burr, so a 400# diamond burr will be finer and leave a smoother finish, but will remove less material than say a 120#.
As with all diamond burrs, using them in the correct way will preserve the life of the drill bit so using them with water on a slow speed will prevent the burr from overheating and make them last longer.
There are burr lubricants available which promise to lengthen the life of your bits but we've not found one yet that does the job sufficiently. Water does just as well. You can always add one drop of washing-up liquid to the water if you wish - no suds though, please!
Diamond Sintered Burrs
Sintered burrs have a much longer life span than coated diamond burrs due to being bonded with several layers of diamond grit instead of just one.
They must be cleaned with an aluminium oxide dressing stone before use, and again after each time you use them. By dressing them you reveal a fresh layer of diamonds each time, so they'll stay good as new for longer.
Whilst more expensive than coated burs, sintered will last far longer. Once you've mastered your technique you might like to splash out on some of these as they are a nice addition to your glass engraving tool kit.
Diamond High Speed FG Burrs
FG Burrs have a 1.6mm (1/16") shank so you'll need an adaptor to be able to use them in your rotary handpiece. These burrs come in a variety of shapes, sizes and grits. Popular burrs in this range are the Extra Fine Flame burrs, great for detail and fine work, and the ball burrs which are ideal for filling in large areas. Or why not try a mixed set of 6 with a few different shapes in?
“These FG burs are very nice to use, I fit them into an adaptor so I can use them in my drill. They are lovely to use for detail, they carve well at slow speeds. The cut is clean, even on low quality glass” - Sandra Snaddon. Guild of Glass Engravers
Diamond Point Burrs (Rats Tail Burrs)
These Diamond Point Burrs will be good to have around if you want to do very fine line engraving such as hair, whiskers, fur or wispy tendrils. They're often referred to as Rats Tails and come in sizes such as 0.6mm, 0.8mm and 2.5mm.
-----------------------------------------------------
To see a full list of our diamond burrs including shapes such as Cylinder, Wheel, Disc, Flame, Bullet, Cone and Lens please click here.
If you can't see the shape or size burr you want - contact us. We're happy to source the right burr for you.
2. Green Silicon Carbide Stone Burrs
Made from Silicon Carbide, these green stone burs are a must for your engraving work. Use them instead of diamond burrs on blank glass (the bits of glass you haven't engraved yet) or use them after the diamond burrs to fill in and add shading to your work.
These will give you the same effect as that of sandblasting. Tidy up any areas of sandblasting that may have been missed with this stone.
It will leave a less pale finish than a white Arkansas stone, but not as bright a finish as a diamond burr so it will dull down the diamond engraving to a slightly softer tone. Also used as a pre-polisher so can be followed with a grey rubber polisher for a very dark effect.
Along with the white Arkansas stone burrs and the silicone abrasive polishers, these are an essential piece of kit if you're looking to add texture and depth to your glass engraving. Again, look for 120 grit with a 2.35mm (3/32") shank. One small 3mm ball shaped one will be suitable to begin with and a flame one is always handy if your budget allows.
- 3mm or 5mm Ball shape
- Flame shape
3. White Arkansas Stone Burrs
White Arkansas Polishing Stones are used for shading and smoothing and are much loved by glass engravers the world over. Start off with the following size and shape:
- 3mm ball
The ball shapes are most commonly used, but as your practice develops you might find you want to add a flame or a cone shape to your set of tools. The different effects and techniques you want to achieve will determine what shapes and sizes of burrs you will choose, and to begin with, it may be a bit of trial and error to see which ones you use the most and what your preferences are.

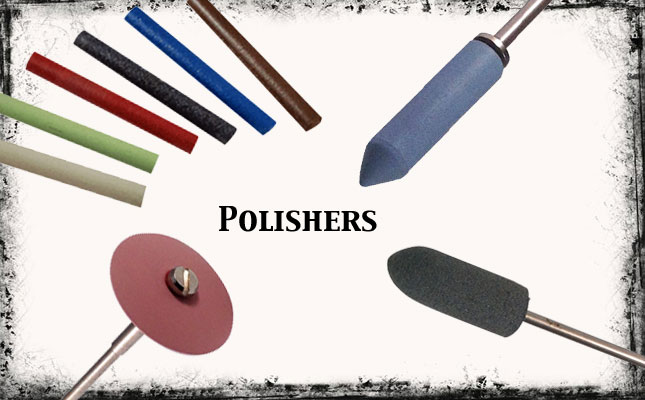
4. Grey & Brown Rubber Silicone Burrs
The Grey Rubber Silicone Polishers and Brown EVEFLEX polishers are great additions to your glass engraving supplies for smoothing and pre-polishing. We recommend the following popular shapes, to begin with:
- Bullet
Much like the Arkansas stones these rubber burrs act as a pre-polisher to your work prior to using your silicone polishers (see below)
Although soft and fine, these rubber burrs are still abrasives so be careful to stay within the lines of your design to avoid making any marks on the blank glass. Easier said than done sometimes I know!
The Grey polisher is coarser than the Brown. Also in the same series as the grey, are green and yellow rubber polishers - some additions to your tool kit for later on perhaps.
Using the Eveflex Brown Bullet Polisher provides the perfect subtle shading tool. Use after the Mini Rubber Silicone Bullet polishers in black (see below). The brown will give a slightly more subtle shading effect than the black. Alternatively, use after the grey rubber silicone polishers as mentioned above.
"I found a lot of uses for the brown polisher and am sure I will find many more. I was doing several pieces where I sandblasted and engraved the pieces, then fire-polished them and after taking them out of the kiln - highlighted areas with light blasting and brought out highlights with the mini black bullet and the brown bullet polisher. " - Susan Bloch. Glass Engraver.
Helpful Note: Sometimes you will find that you want to polish the top of an area without going into the cut you made with diamond burrs so that the top is dark but the cut is still white. This is done by using a hard polisher such as the grey or brown rubber polishers mentioned above to smooth out the top surface ("mountains") without going down into the cuts ("valleys"). If you want to do the reverse and just polish the valleys without touching the mountain tops then you can use a Mini Rubber Silicone polisher in knife edge or wheel shape to follow the path of the "valleys" without touching the surrounding "mountain tops".
5 . Mini Rubber Silicone Abrasives
When you first start out, try using a black mini rubber silicone polisher in a bullet or wheel shape. Black is the medium grade of these polishers and will set you off in the right direction. As you expand your knowledge and skills of your new craft you'll find you want a wider range of grades and shapes, they come in various shapes: knife edge, cylinder, wheel and bullet and various grades: coarse (white in colour), medium (black in colour), fine (blue in colour) and extra fine (pink in colour) these will be for your final polish and will help to add depth to your engravings.
We recommend:
- Black (medium grade) in Bullet or wheel shape.
If you're feeling adventurous then we supply a pack of 16 polishers which will give you 1 of each shape and grade.
Make sure to use our recommended taper mandrel with the bullet and cylinder shaped polishers otherwise, you may find the polisher flying off when you start your drill if the incorrect mandrel is used.
Also similar but more rigid and therefore harder wearing are the polishers from the EVEflex Technik range. These are available in cylinder and wheel shapes.
Helpful Note: When you engrave glass using a drill you can get a very pronounced illusion of depth without actually cutting deeply into the glass. If you have engraved a house and you want it to look more real then you have to imagine the sun shining down on the house. Some parts of the house will be in full sunlight, some in full shade and some in partial shade. If you take an area of the house that wants to be in full shade but has been cut into with a diamond tool (and now looks bright white) all you have to do is polish the surface back with various rubber and silicone polishers until it is much darker. The polisher will smooth out the marks made by the diamonds without substantially changing the depth of their cuts. This is important as the cuts give visual clues as to the relative positions of the parts of the house.
I use the Knife edge wheel which is very effective for dulling the light surface strokes on glass, allowing me to over engrave areas and build a detailed graduation towards the highlighted area required" - Alan Sinclair“For Glass Engraving these are great if any light mistakes are made for reducing the mark and covering up the mistake, also for helping in the shading of detail. Am happy as larry with them” - Bill Jeans
Mini Rubber Silicone Pin Polishers
Mini rubber silicone pin polishers are commonly used by glass engravers for smaller, more detailed work. These pin polishers are 3mm in diameter and fit into their own special mandrel. They come in different colours and each one relates to a different grade thereby giving your work a different effect.
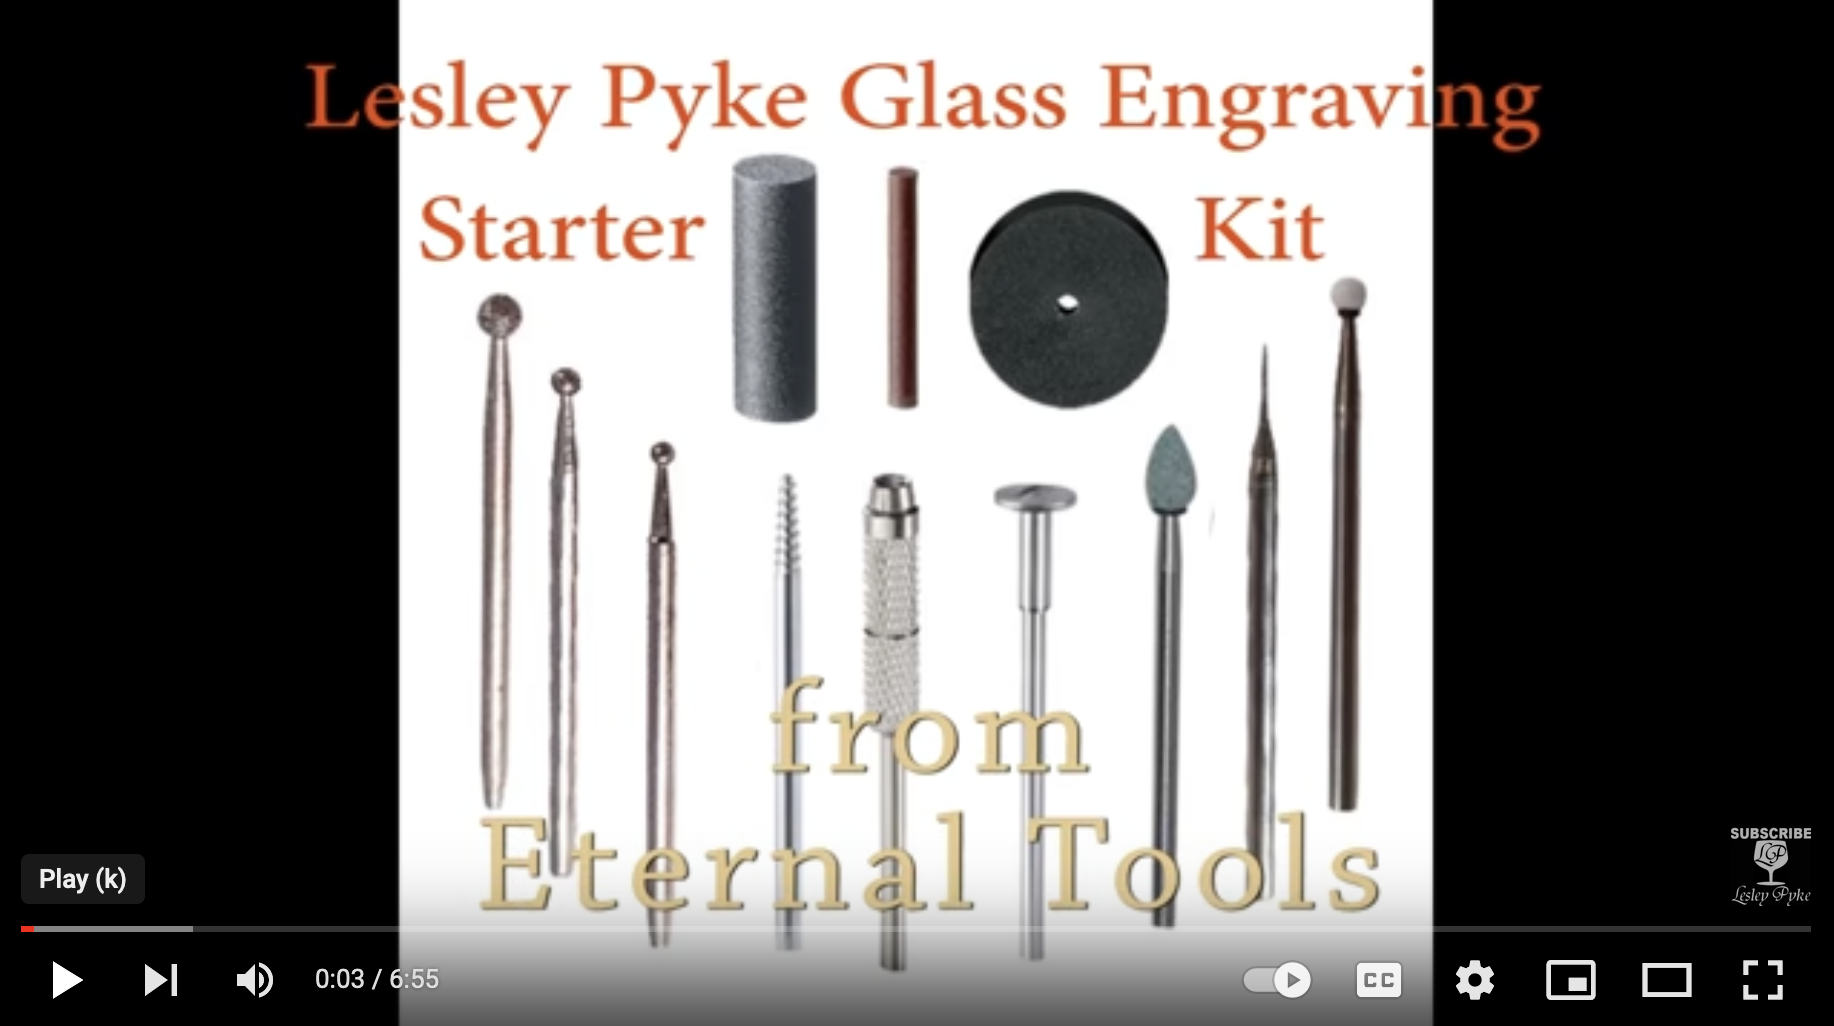
Lesley Pyke's Starter Kit as featured at the beginning of the article includes the brown pin (SPP1BROWN)
************************
If you would like to take the plunge and start glass engraving we have a Bare Minimum Glass Engraving Kit for beginners, or if you would prefer you can join Lesley Pyke on her Patreon tutorial website and purchase a 'Lesley Pyke Glass Engraving Starter Kit'. The kits contain a small variety of the above-mentioned items so you can begin to engrave, add depth, shade and polish to your glass work.
The below image shows some fantastic glass engraving work done by Graham Smith using the Bare Minimum Glass Engraving kit.
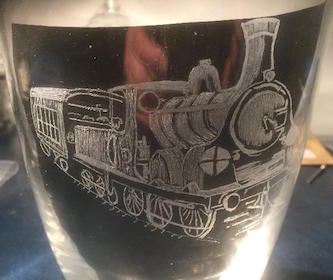
" Excellent Glass Engraving kit. Have now used the majority of the tools and I'm very happy with them all" - Graham Smith
Here's a short introduction video from Lesley showing you how to use the different bits and burrs in your Lesley Pyke Glass Engraving Starter Kit. To view this on Youtube, CLICK HERE.
Further Helpful Items You May Need:
- Mask - so you don't breathe in the dust
- Headband magnifiers such as an Optivisor- protect your eyes and help magnify your work.
- Cloth - to wipe away any dust or water as you work
- Sharpie pen - or wax pencil, to draw your design
- Tracing paper
- Water dispenser - either a drip feed system, a spray bottle, a sponge or just dab it on with your fingers as you work.
- Black Cloth - set up a cushioned workspace to rest your glass on, along with black cloth covering it to see your design better.
- A Light or Lamp to illuminate your working area.
- A Diamond Scribing tool to sign your work
Safety Tips When Glass Engraving
It goes without saying that when handling electrical equipment and glass you need to be careful. Please use these tips as a reminder:
- Always wear protective gear: mask, goggles or glasses and a long sleeved top to protect bare arms from any glass debris
- Engrave in a well ventilated area or use a dust extractor
- Remove any items of jewellery or clothing that could potentially get caught up in the drill or drill leads.
Helpful Links for Beginner Glass Engravers
The Guild of Glass Engravers - Network for glass engravers the world over. A super guild with some amazing talent from beginners to advanced.
Lesley Pyke's Glass Engraving - Facebook page for beginners to learn techniques, share their work, ask questions and meet others. Furthermore, Lesley has some great Youtube videos that are very helpful.
If you have a blog, organisation or company you would like to see added here please email us.