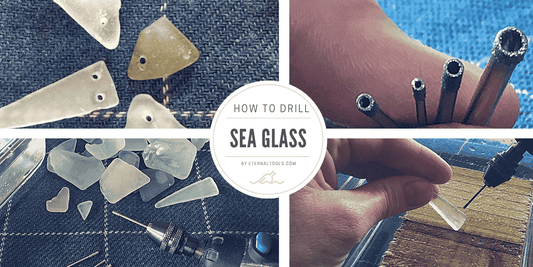
How to Drill Sea Glass: A Beginner-Friendly Guide
Drilling sea glass, also known as beach glass, is a wonderfully creative way to turn ocean-tumbled treasures into jewellery or art. With just a few tools, you can easily make pendants, earrings, or even inlay pieces. In this guide, I’ll show you everything you need and how to safely drill sea glass step-by-step, whether you're a beginner or experienced crafter.
The same principles apply to all small pieces of glass, including beach pottery and art glass, so once you've mastered this, you'll be ready for plenty of other projects too.
How to drill sea glass, or how to drill glass, the principles and tools are all the same. Sea glass, or beach glass, is relatively small, so smaller drill bits will be used than if you need to drill other types of glass, but other than that, the same rules and methods apply.
Read on, and follow along with me to find out how easy it is to start drilling sea glass and beach glass, and other small pieces of art glass.
What You’ll Need to Drill Sea Glass
This method also works for beach pottery and other small glass pieces. Here's what you'll need to get started:
What You’ll Need to Drill Sea Glass
This method also works for beach pottery and other small glass pieces. Here's what you'll need to get started:
• Sea glass (or beach pottery, art glass, ceramic shards)
• Marker pen or Chinagraph pencil for marking your hole
• A rotary tool such as a Dremel 3000
• Optional: Flexible Shaft or Drill Press for more control
• Diamond drill bits (either a core drill or a solid-ended drill bit)
• Dremel Multi Chuck or adjustable collet to hold small drill bits
• A shallow plastic container such as a sandwich box or ice cream tub
• A small piece of wood to support the glass while drilling
• Water (to cool the drill bit and glass while drilling)
• Optional: Blu Tack or beeswax to hold the glass steady
• Old cloth or tea towel to mop up water and debris
• Safety goggles and a dust mask
What Size Diamond Drill Bit Should You Use?
The drill bit size you choose depends on what you're making. For example, if you're creating a keyring, you'll need to match the hole size to your keyring fitting. Always plan ahead before drilling.
Common sizes used for jewellery: 1mm, 1.5mm, 2mm, and 3mm
Need a larger hole? Try one of the following:
• Bottle Neck Diamond Core Drills – 6mm diameter x 2.35mm shank. These will fit a hobby tool with an adjustable chuck such as a Dremel.
• Standard Diamond Core Drills – available from 3.5mm to 60mm diameter. Sizes 3.5mm and 4mm fit a Dremel with a Multi Chuck. Larger sizes require a household drill with an adjustable chuck.
Want to experiment? Try our ready-made kit: Diamond Drill Bits Set for your Dremel. It includes:
• 2 x solid-ended small diamond drill bits in two different sizes
• 2 x small diamond core drills in two different sizes
• 1 x Dremel Multi Chuck
Core Drill or Solid Diamond Drill Bit – Which is Better?
Solid diamond drill bits have a larger surface area and are more robust. They last longer and are perfect for tougher, denser sea glass. However, they drill through a little slower.
Diamond core drills for sea glass are hollow all the way through. Water flows through them during drilling, which helps cool the bit and flush out debris. They drill faster but may not last as long.
Tip: Keep both types in your tool kit. You won't always know how tough a piece of sea glass is until you start drilling.
Step 1: Setting Up Your Drill Area
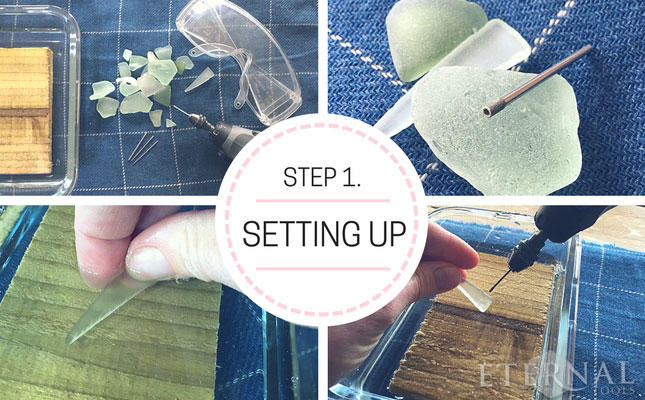
1. Mark your sea glass where you want the hole using a marker pen or chinagraph pencil.
2. Place a small piece of wood inside your shallow container. Rest the sea glass on top and fill with water until the glass is submerged by about 1cm.
3. Optional: Hold the glass in place with Blu Tack or a small blob of beeswax.
4. Select your drill bit and attach it into your Multi Chuck. Ensure enough of the bit is exposed so that no part of your chuck or drill touches the water.
Helpful tip: You can drill halfway through from one side, then flip the glass and drill from the other side. To align the holes:
- Wrap two threads of cotton around the glass so they cross at the hole point
- Mark the intersection points on both sides with your pen
This method is especially helpful if the glass is thicker than your drill bit. You can also try our extra-long diamond drill bits which are 100mm long.
Important Safety Tips
• Clear your work area and remove any tripping hazards
• Secure wires and leads to prevent snagging
• Wear an apron and fitted clothing (no loose sleeves)
• Use a drill stand and flex shaft if possible
• Always keep your drill and hands dry – use an old towel or cloth nearby
• Plug your drill into an RCD-protected extension lead with a thermal cut-out if using near water
• Wear safety goggles and a dust mask
• Ensure your workspace is well-ventilated
Warning: Always be extra careful when using electrical tools near water. Make sure your drill's chuck and electrics stay above water level at all times.
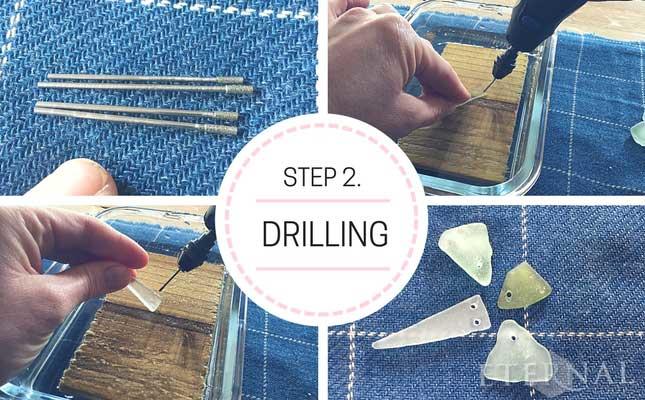
Step 2: Drilling the Glass
- Keep your sea glass submerged in water. Hold it gently with your fingers or secure it with a small clamp or vice.
- Set your drill to its slowest speed.
- Start drilling at a 45-degree angle to make an initial groove. This prevents the bit from slipping.
- Once the bit has made a notch, slowly move the drill to a vertical position and continue drilling with light pressure.
- Lift the drill slightly up and down occasionally to let water circulate and remove debris. This also cools the bit and the glass.
Tip: Never apply heavy pressure or increase the speed. Let the drill do the work. Sea glass varies in density and some pieces may take longer than others. Patience will help preserve your drill bits and prevent glass from cracking.
In the video above, the 4mm thick piece of sea glass took under 50 seconds to drill using a 1.5mm small diamond core drill.
Note: If you're using the two-sided drilling method, flip the glass once you’ve reached halfway and repeat the steps from the other side.
Step 3: Finishing Touches and Creative Ideas
Carve Shapes into Sea Glass
Once you've mastered drilling, why not try carving into sea glass? You can create decorative designs like hearts using mini diamond burrs.
Follow our guide: How to Carve Hearts in Pebbles & Sea Glass
Cutting and Shaping Sea Glass
Prefer your glass pieces a little more uniform? You can slice or trim sea glass using diamond wire hand saw blades.
Learn how in: How to Easily Cut and Shape Sea Glass
Inlay a Gemstone or Crystal
Using small diamond ball burrs you can carve a 'dip' into your sea glass so that you can inlay a small gemstone or crystal. A carbide hart bearing cutter is useful if you are using Swarovski crystals.
Need a Bigger Hole?
If you've already drilled a hole but it's too small, use a diamond twist drill to widen it. These are designed to enlarge pre-drilled holes by grinding away at the inside edges.
Note: Do not use a twist drill to create a new hole from scratch. They're designed only to expand existing ones.
Sea Glass Jewellery Making Ideas
Once you've mastered the basic techniques, you can turn your drilled sea glass into unique handmade jewellery. Here are a few project ideas:
Sea Glass Beads
Use your sea glass as you found it or shape it into a rounder bead using a bead shaping burr.
To smooth the edges, use a diamond file followed by abrasive diamond sheet or polishers such as Diamond cloth, EVE Diapol rotary tool polishers, or diamond polishing paste.
Once shaped, drill the bead with a diamond drill bit to add a bail, link or leather cord.
Sea Glass Pendants
Drill a single hole and attach a jump ring, necklace chain and lobster claw. You can also try wire wrapping. For this you’ll need:
- Flat nose and round nose pliers
- Wire cutters
- Sterling silver or beading wire
Turn your sea glass into earrings, pendants, or charm bracelets.
Bezel Setting Sea Glass
To bezel set a piece of sea glass, flatten the back using a diamond hone or diamond file.
For chipped edges, trim them using diamond wire blades.
For teardrop-shaped and other odd shapes, use a bell cap.
Silver metal clay is also ideal for creating custom settings.
Embellishing with Crystals
Use a diamond countersink burr or ball burr to make a small dip in your glass, then glue in a crystal using G S Hypo Cement.
Ready to Start Drilling?
We hope this tutorial inspires you to get creative with sea glass. If you give it a try, we'd love to see what you make. Share your photos with us!
For further help and inspiration, check out:
For further help and inspiration, check out:
• 12 Things You Should Know About Diamond Drill Bits
• What is Sea Glass? Where to Find It and How to Drill It
Disclaimer: Using rotary tools near water is not endorsed by any major rotary tool manufacturer. If you choose to drill near or under water, you do so at your own risk. Always be aware of the hazards of combining electricity and water.
