Paul Amphlett was a self taught artist and illustrator for 18 years until 2007 when he went to the Royal Forest of Dean to help and work with his dear friend and stained glass artist Mollie Meager.
A fantastic opportunity, Mollie taught Paul a vast array of skills such as glass cutting, soldering and acid etching to name but a few. Here he was also introduced to glass engraving.
Tools to Begin Glass Engraving With
- Diamond Ball Burrs
- Dremel Drill
- Flexible Shaft (optional)
Paul began using hand held rotary tools with diamond ball burs, and more recently has been using a Dremel drill with a flexi shaft which has been invaluable.
Anyone can start glass engraving, to find out which essential tools you can use to begin with, click here.

How to Put your Image onto the Glass
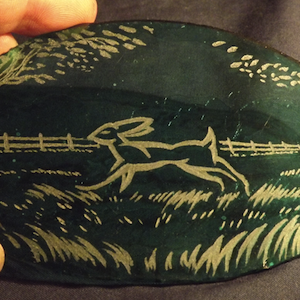
He begins by painting a sketch of the image on the glass with Titanium white acrylic paint, watering the paint down so the lines are thin to prevent coating the engraving tool with paint. This stage is very useful as it doesn't look too dissimilar to the finished white engraved lines.
Paul then lightly engraves the outline, wiping away the paint along the way and then sets about engraving the image in full. As this method only produces a solid white line it is only suitable for line drawing type illustration. The only way to create shading is by using cross hatching.

Tools for Shading in Glass Engraving
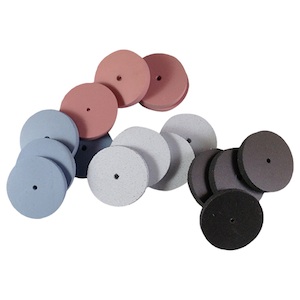
- Mini rubber silicone polishers, varying grades
- Green silicon carbide stone burrs
- Grey Rubber silicone polishers
To progress with his shading techniques and achieve more subtle shading he needed some advice and so contacted artist engraver Lesley Pyke. Lesley advised him to go to her supplier, Eternal Tools and look for the polishing wheels.
Mini Rubber Silicone Polishing Wheels
Paul went on to say...
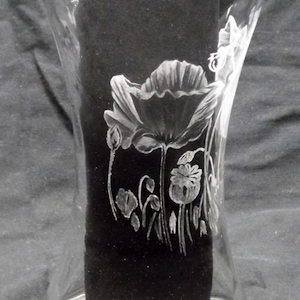
"I am still trying to master these wheels but I am delighted with the effects I can now create. I used a stone to engrave the petals of the poppies, this left them a frosted white I then polish this back to get the contours. The different grades of polishing wheels allow me the freedom to create very delicate shading, I can't recommend them highly enough and wish I had found them years ago"
Paul's latest work using his new polishers


Thanks to Paul for sharing his wonderful and inspiring work with us, we look forward to seeing more of Paul's work and hear more of his tips and helpful information. If you'd like to take a look at Paul's work, more can be seen at S&Partworks


